Tenbyte Virtual Private Network (VPC)
This guide shows you how to create and manage firewalls in Tenbyte Cloud.1. Select Firewall from Dashboard
-
From your dashboard, click on Firewall to create your Firewall.
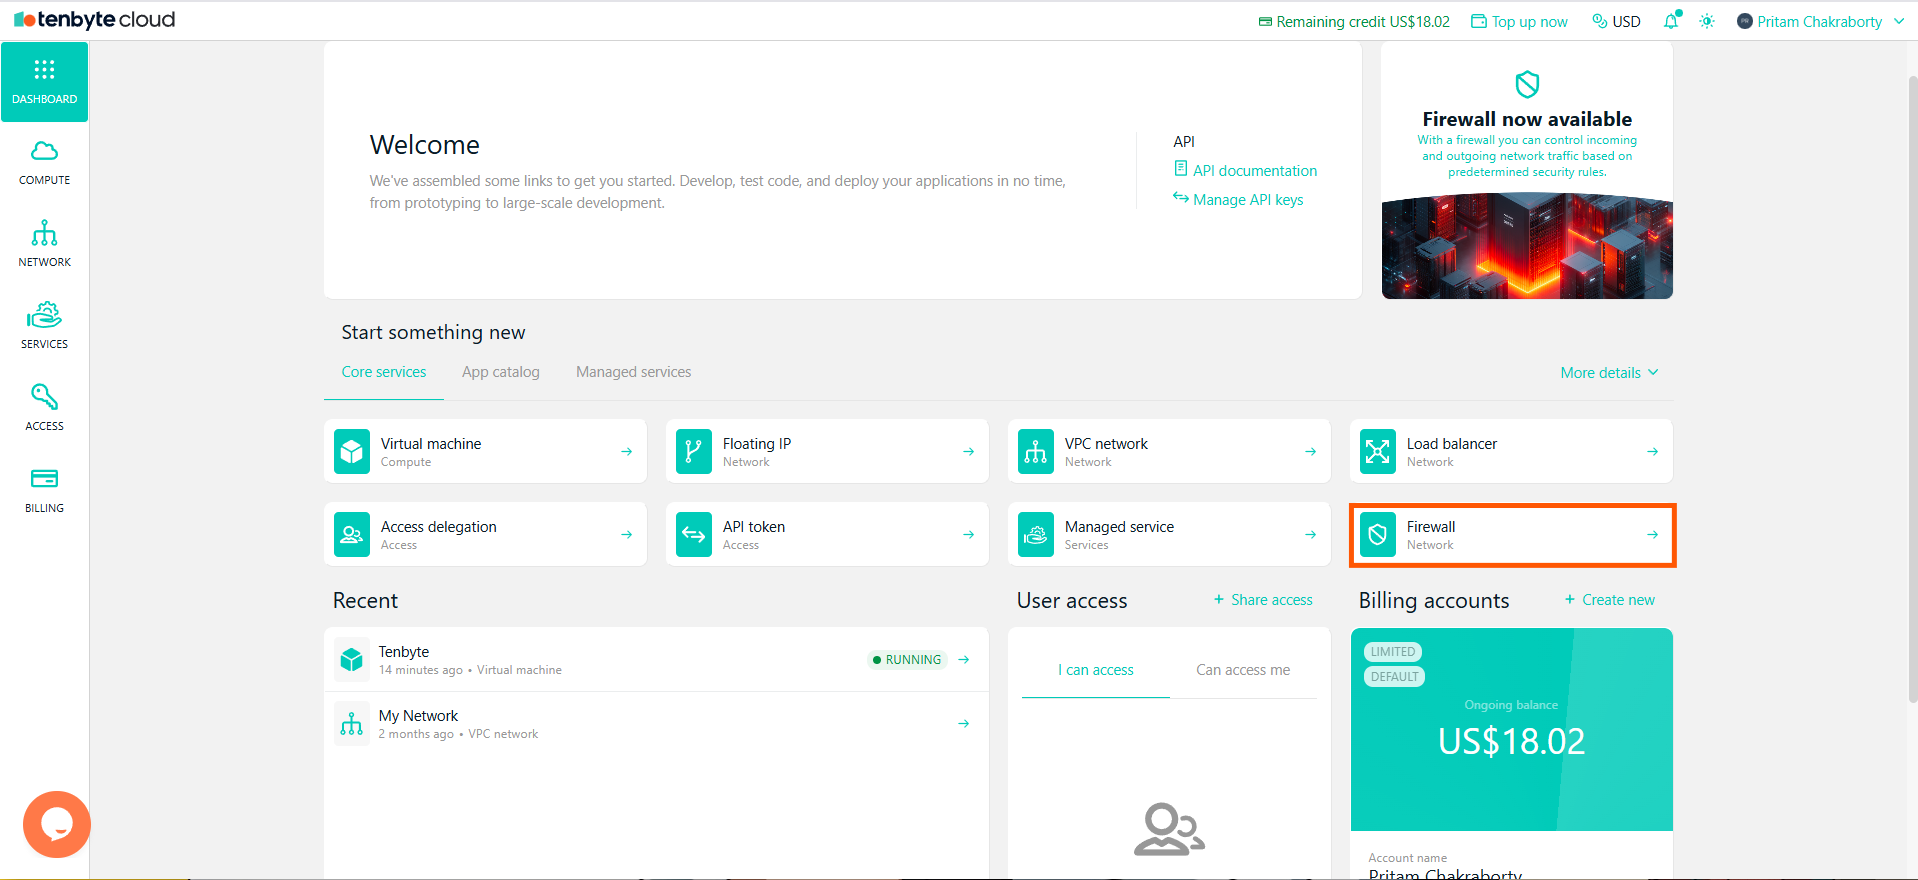
Select Firewall
2. Create a Firewall
- Choose Firewall as the Type.
-
Choose the data center where the firewall will be applied.
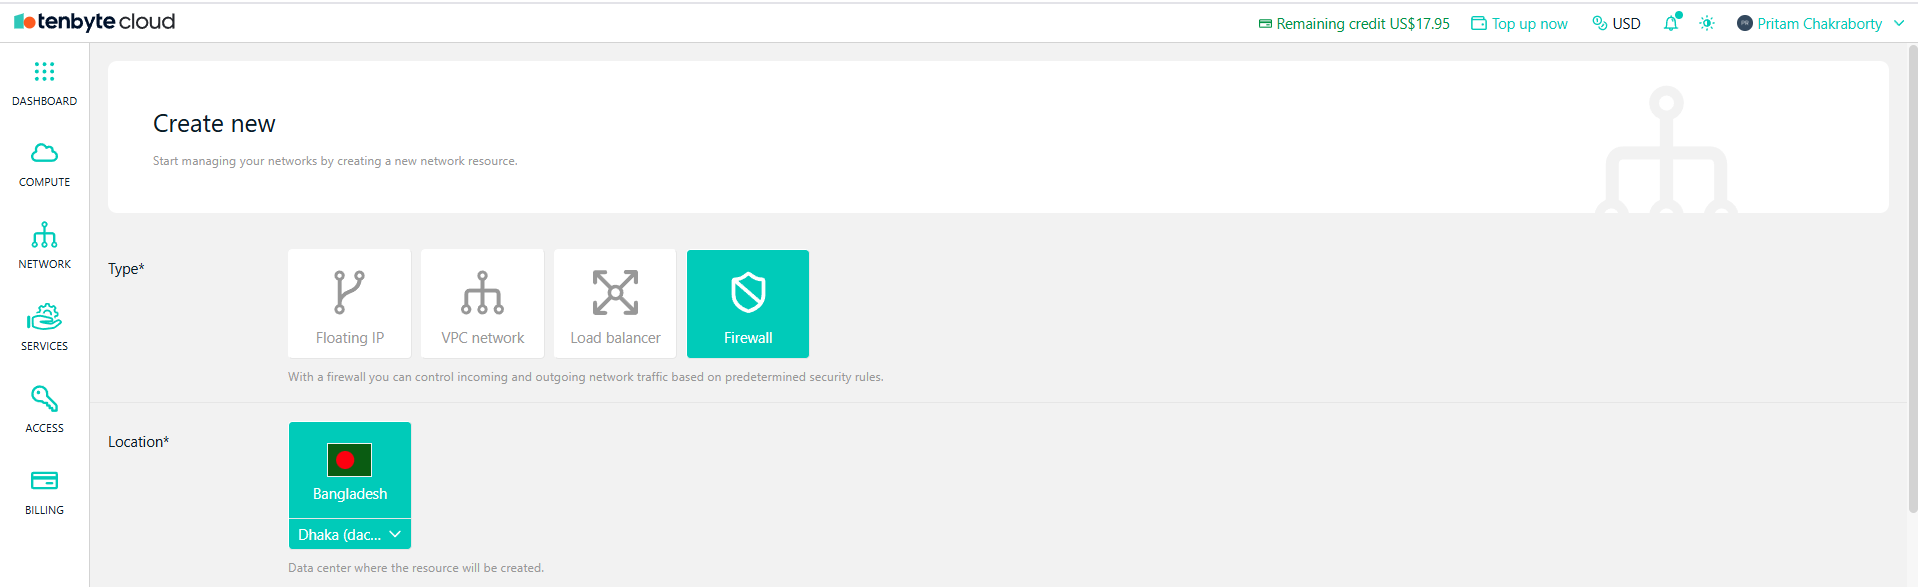
Create a Firewall
Configure Inbound Rules
-
Under Inbound rules, you can specify the traffic allowed to enter your virtual machine.
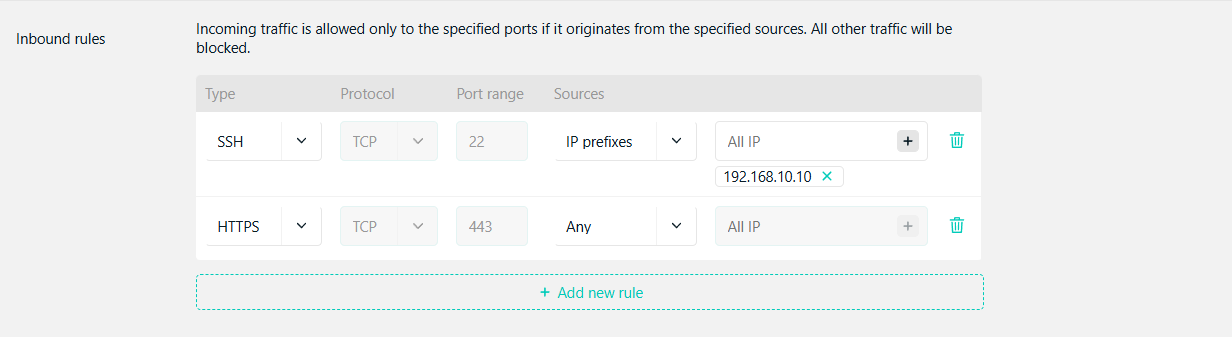
Configure Inbound Rules
- Type: Select the type of traffic.
- Protocol: Choose the protocol.
- Port Range: Specify the port range.
- Sources: Enter the IP prefixes allowed to access the VM or select Any to allow all incoming traffic.
Configure Outbound Rules
-
Under Outbound rules, specify which traffic can leave your virtual machine.

Configure Inbound Rules
- Type: Select the type of traffic.
- Protocol: Choose the protocol.
- Port Range: Specify the port range.
- *Destinations: Select All IP to allow traffic to any destination or specify a target IP range if you want to restrict the destinations.
Configure Firewall Settings
- Provide a name for the firewall.
- Choose the appropriate billing account to associate with the firewall.
The firewall service is free, but the resources like VMs attached to it will incur additional charges.
-
Click Create to finish creating the firewall. It will now be available to assign to your virtual machine.
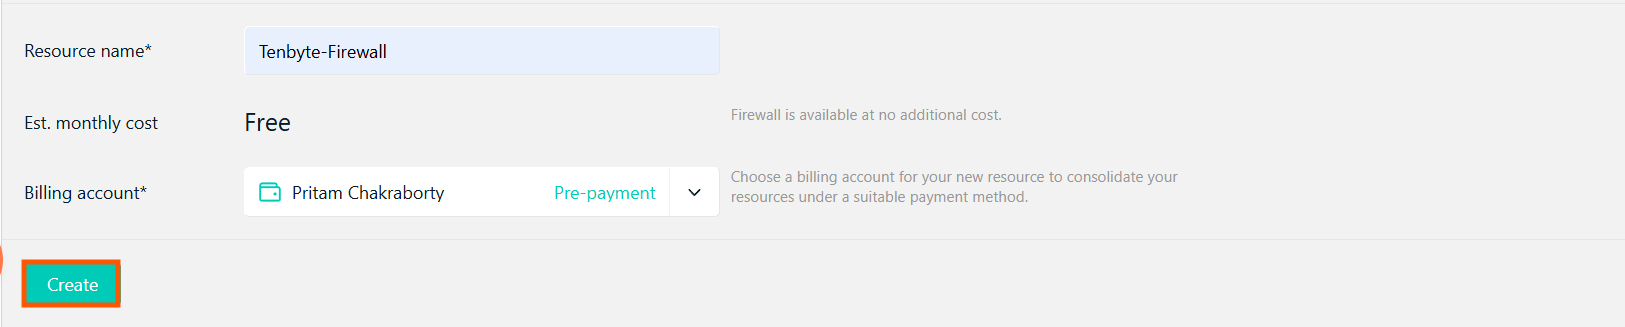
Configure Firewall Settings
3. Assign Firewall to VM
- After creating the firewall with the inbound and outbound rules, go to your created VM dashboard.
-
Navigate to the Firewall section.
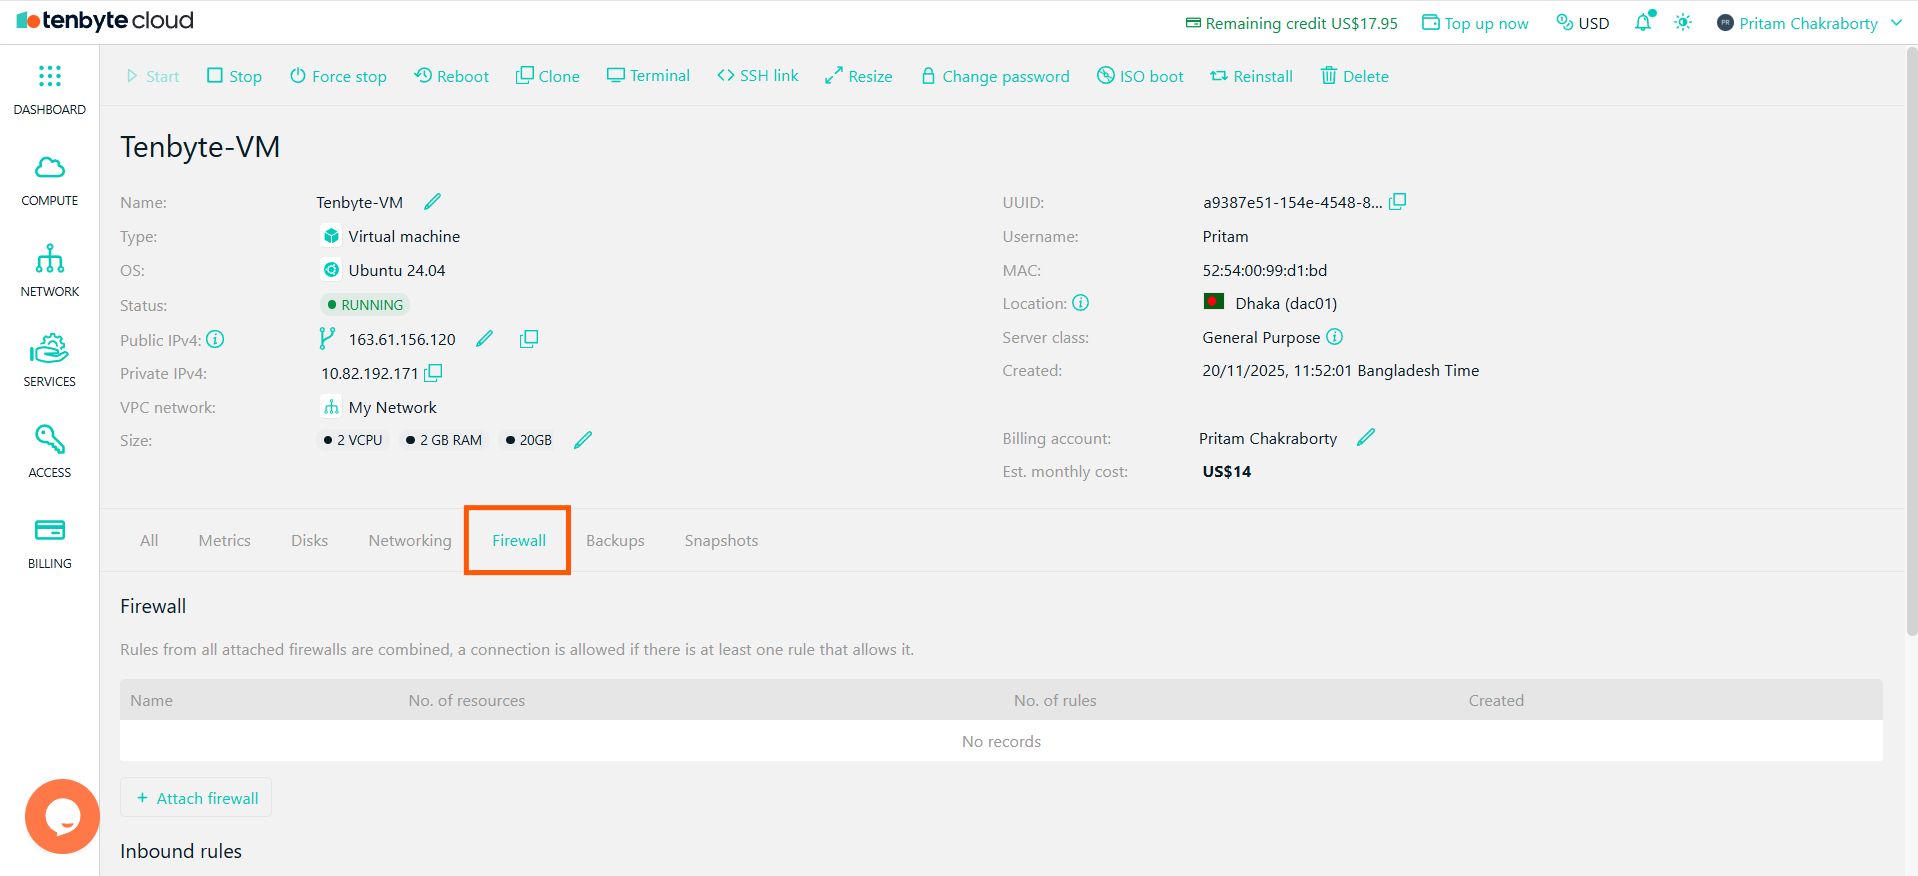
Navigate to Firewall Settings
-
Click on Attach Firewall.
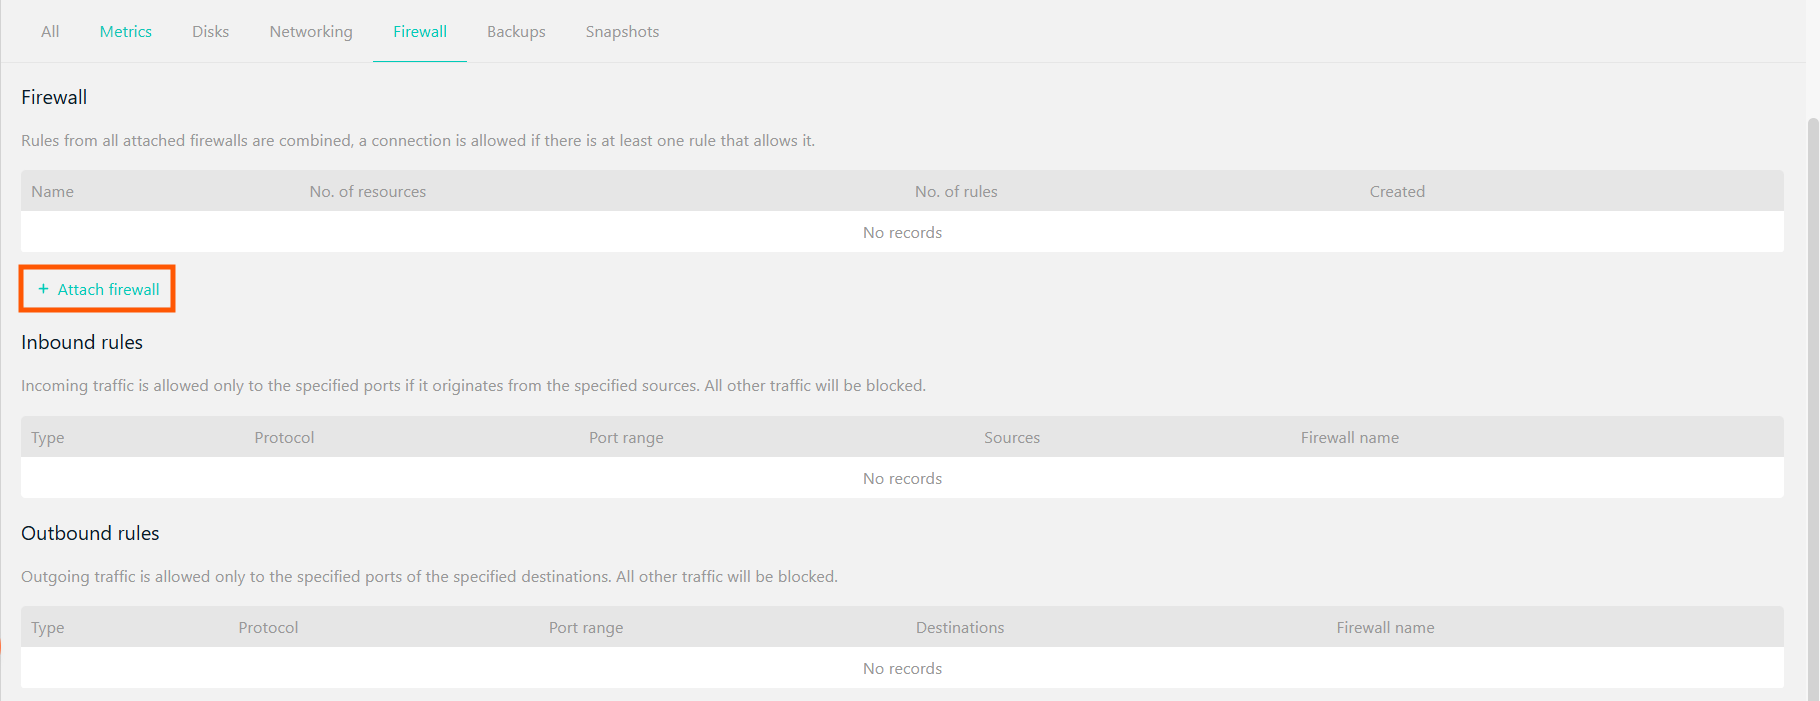
Attach your Created Firewall
-
Select the firewall you created and click on Add.
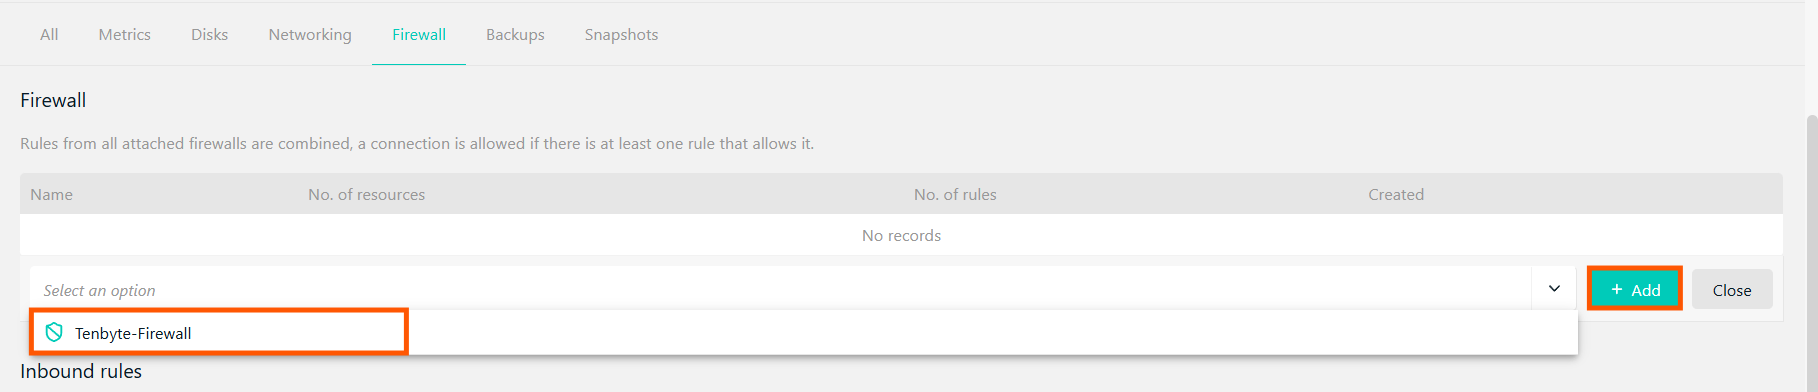
Select the firewall
-
Once added, the firewall rules will be applied to the VM, ensuring that only allowed traffic can access it.
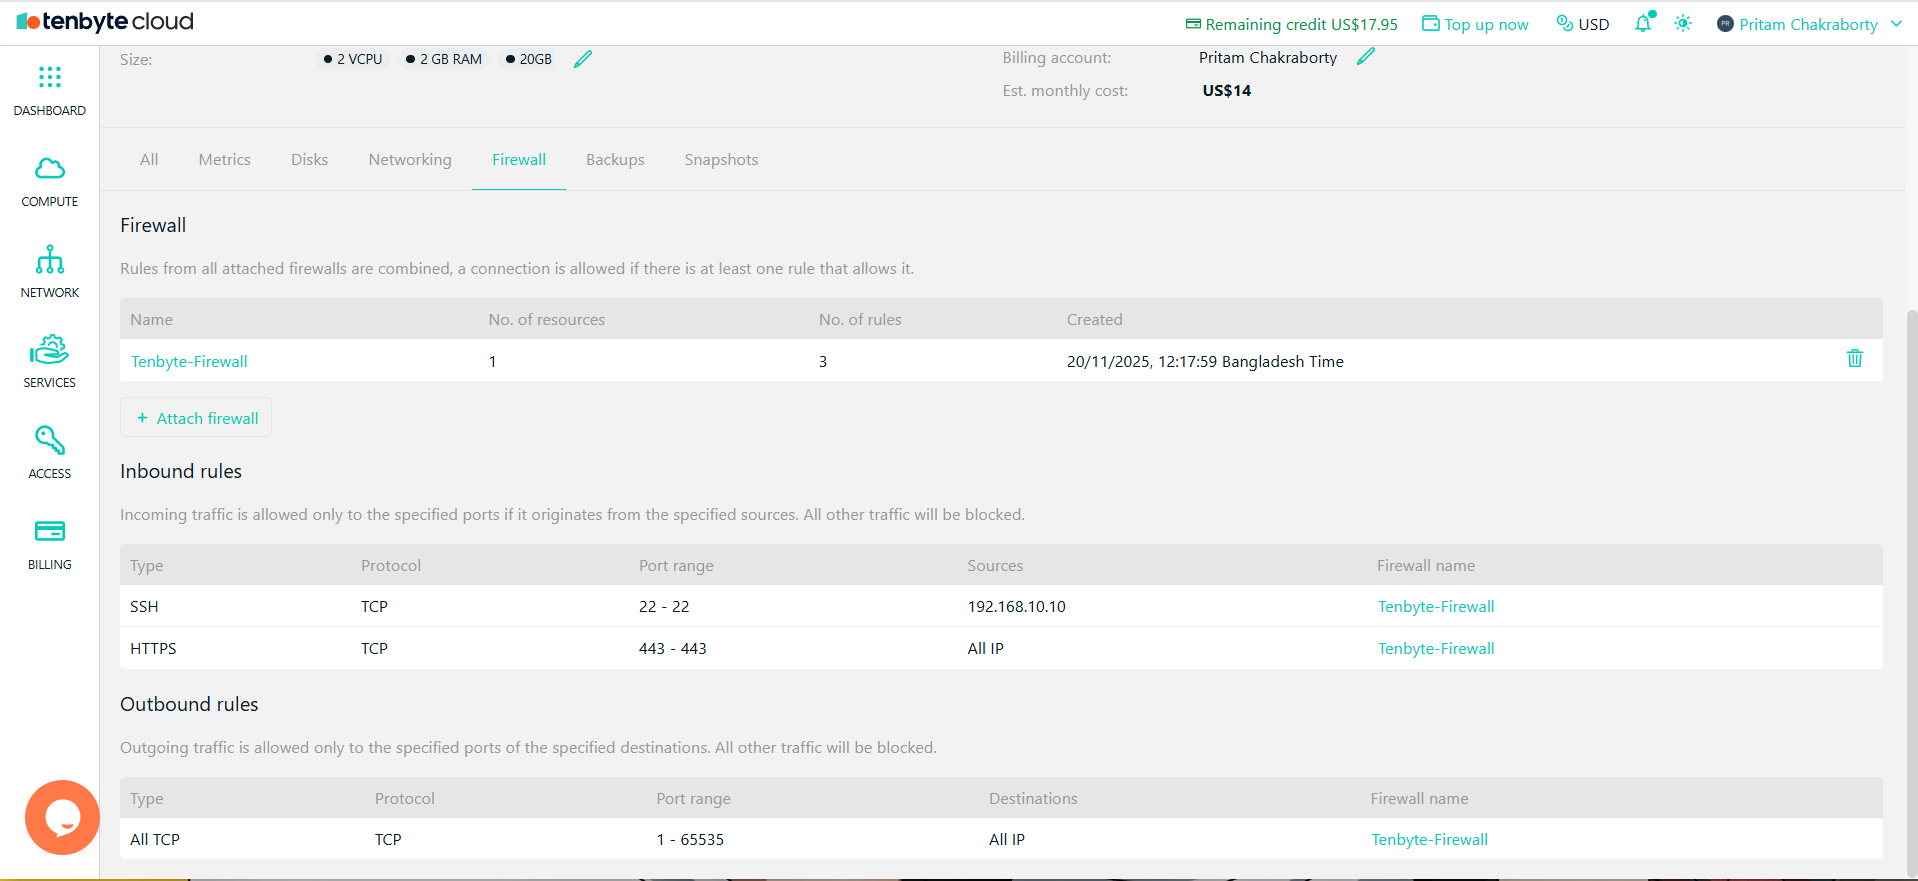
View your Firewall Configurations