Virtual Machines in Tenbyte Cloud
This guide shows you how to easily create and manage high-performance VMs that are secure, cost-effective, and tailored to your needs.1. Select Virtual Machine
-
From your dashboard, click on Virtual Machine to create your first VM.
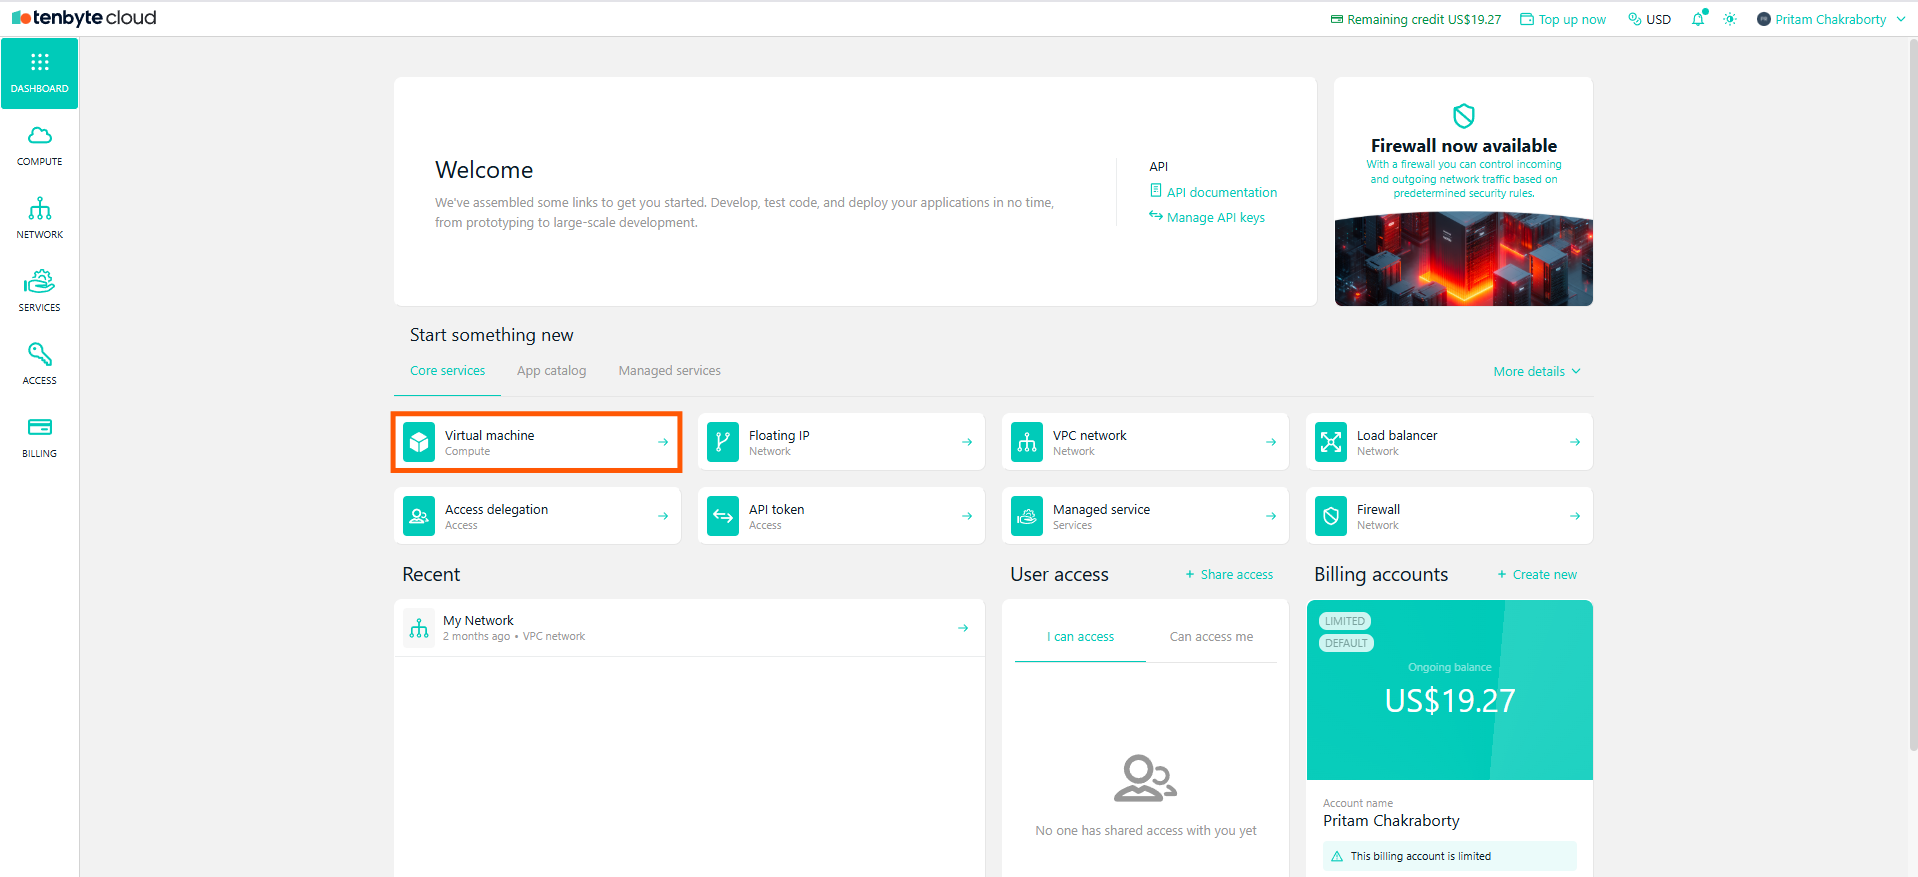
Select Virtual Machine
2. Choose Operating System
-
If you want to install an operating system, select Operating System and choose the OS.
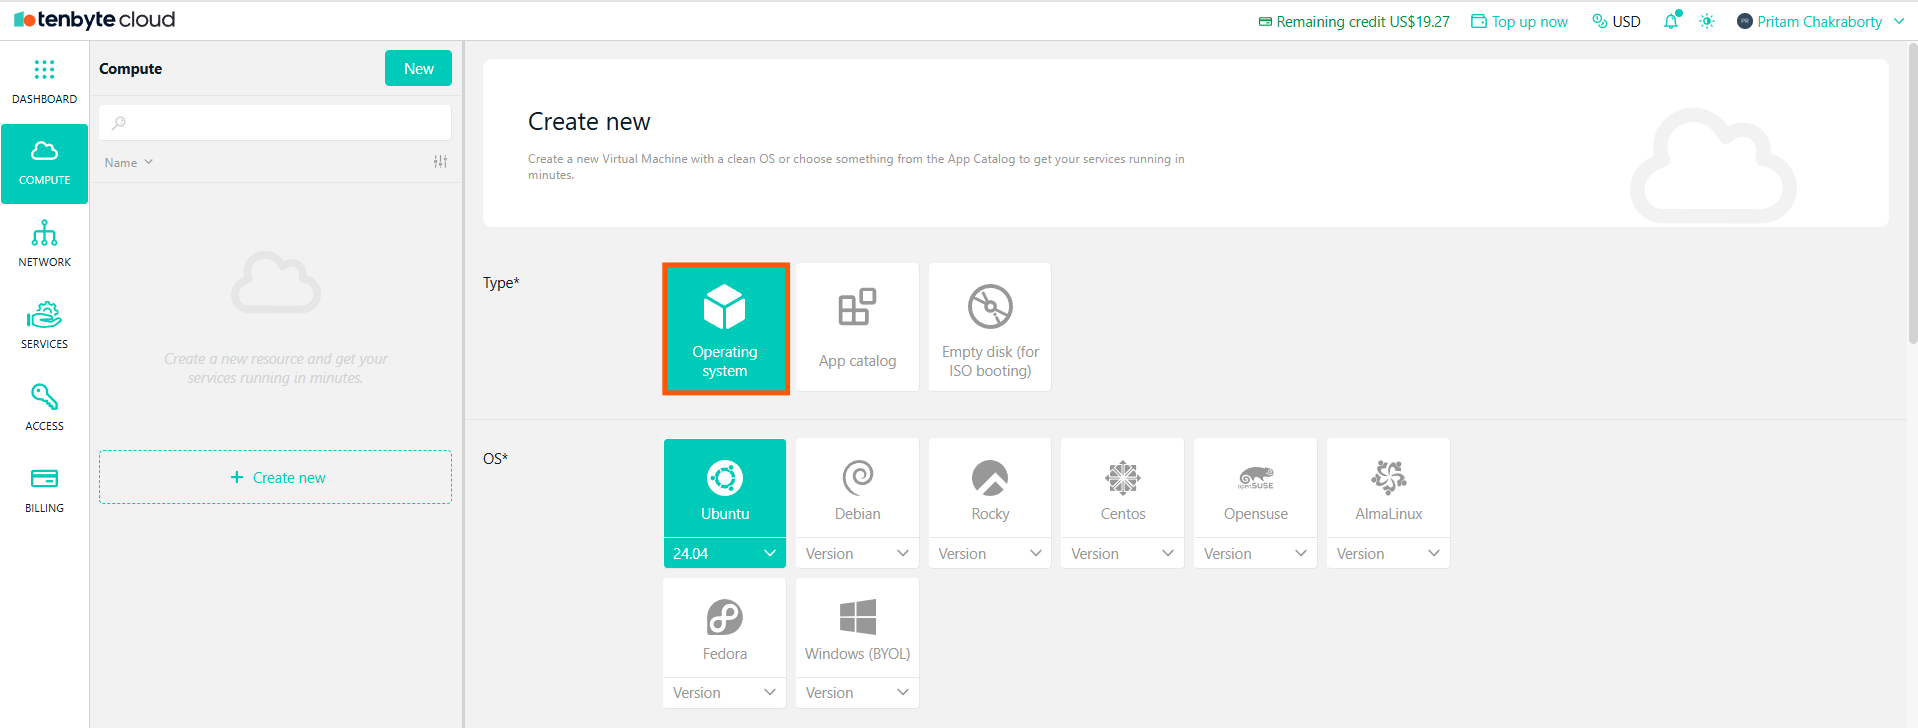
Select Operating System
UbuntuDebianRockyCentOSOpenSUSEAlmaLinuxFedoraWindows (BYOL)
3. Choose App Catalog
-
If you need an application, select App Catalog.
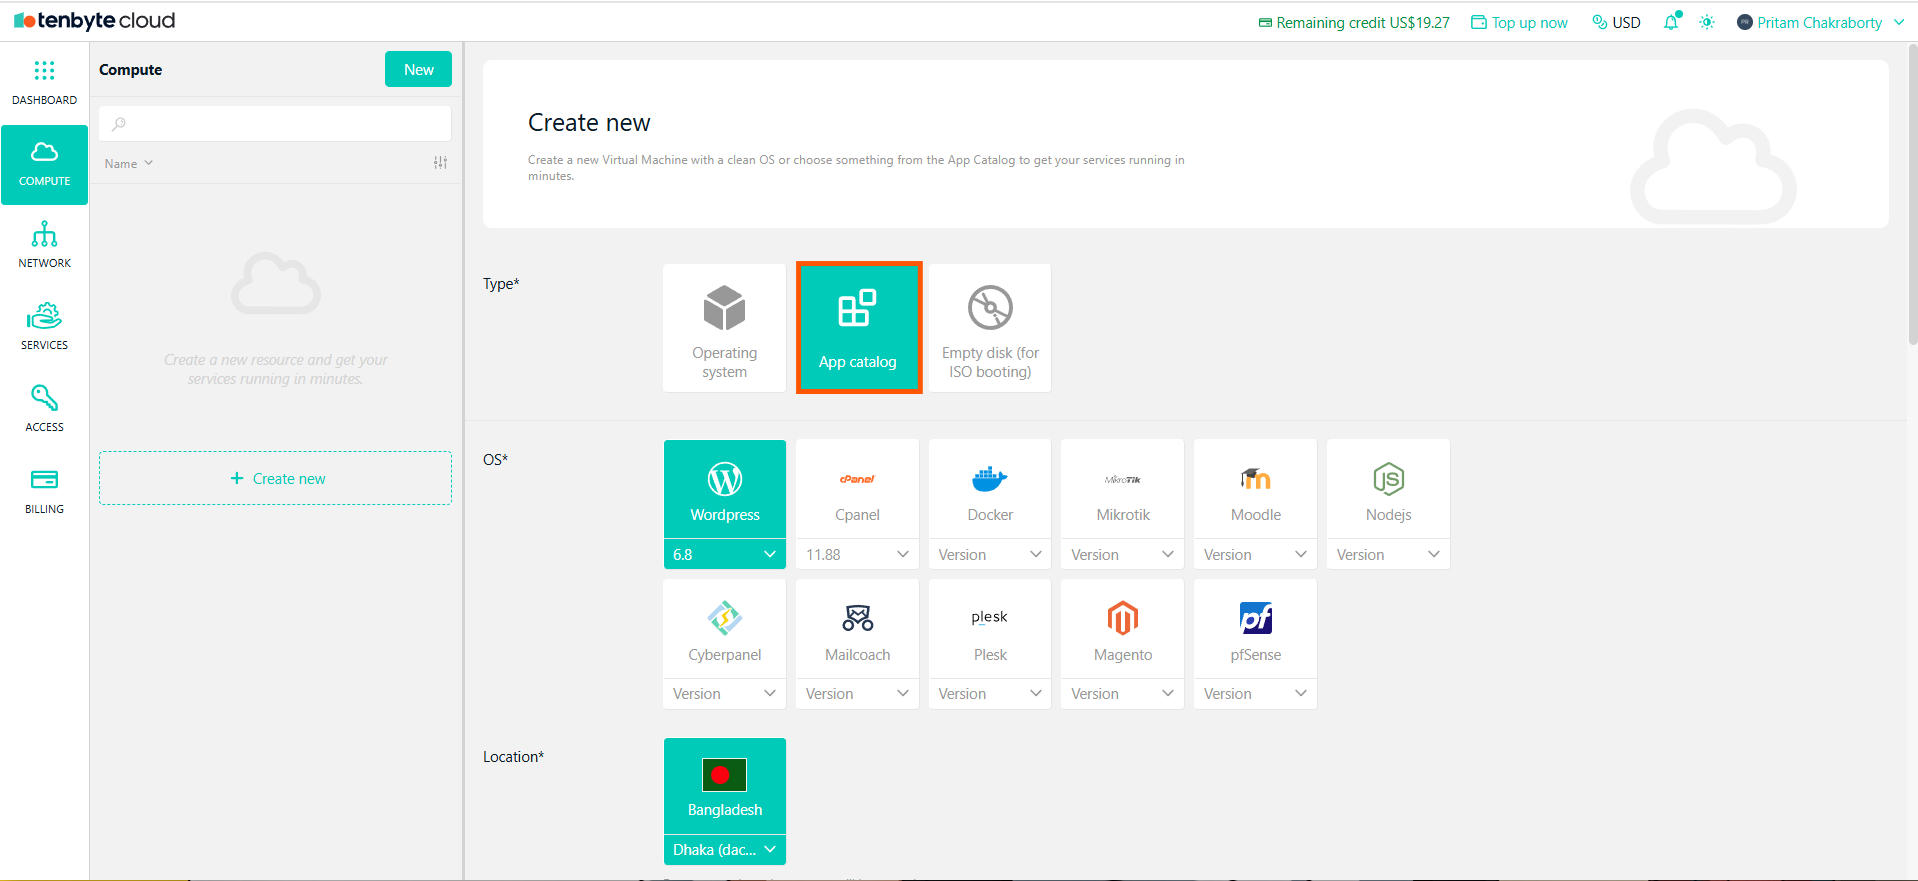
Select App Catalog
cPanelDockerMikrotikMoodleNode.jsCyberpanelMailcoachPleskMagentopfSenseWordPress
For both operating systems and applications, you can choose the version that best fits your requirements during the setup process.
4. Choose Empty Disk for ISO Booting
- If you prefer to install the OS manually via ISO, select Empty disk (for ISO booting).
5. Select your Location
- Choose your Data center where the resource will be created.
6. Select Server Class
-
Choose between General Purpose or Heavy Compute based on your workload.
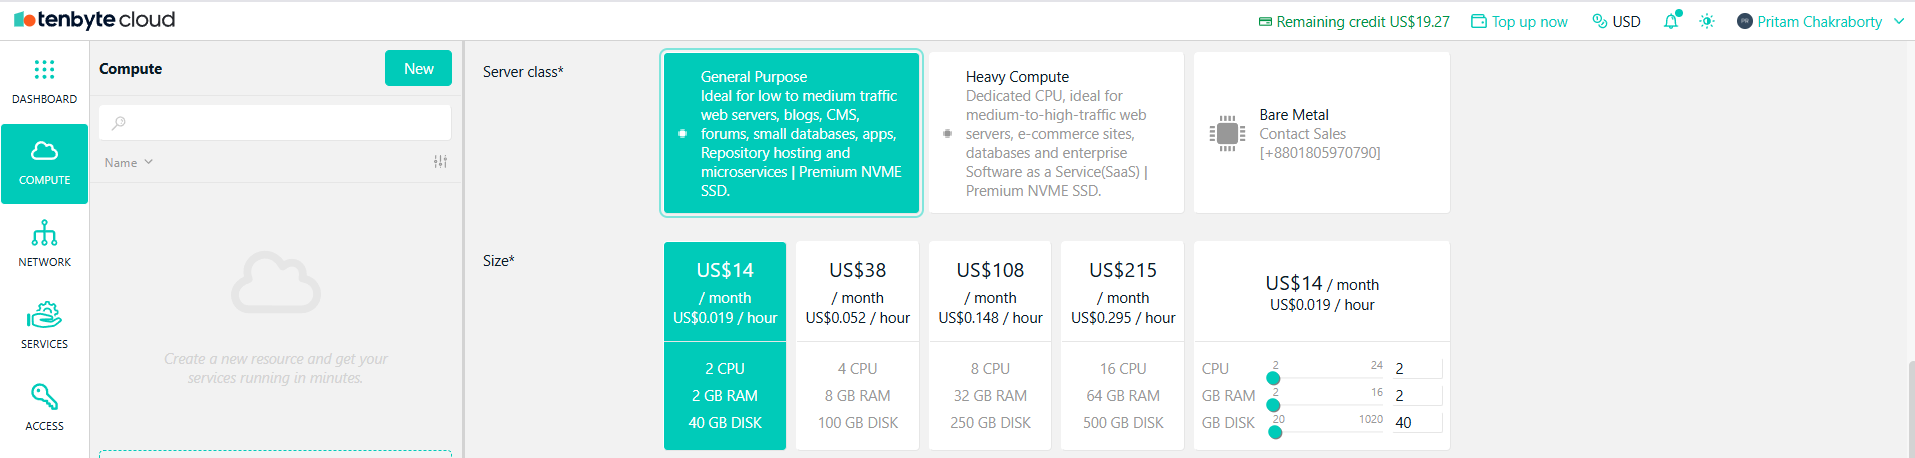
Select Server Class
- General Purpose: Suitable for low to medium traffic.
- Heavy Compute: Best for high-traffic applications and enterprise-level needs.
7. Configure your VM Size
- Select the VM size based on the resources your application requires.
-
You can customize the configuration of your VM by adjusting the number of CPU cores, RAM, and storage to match your exact needs.

Configure VM Size
8. Public IPv4 Address
- If you require an external IP for your VM, enable Public IPv4.
Enabling Public IPv4 will incur an additional US$2/month charge.
9. Select VPC Network
-
Choose an existing VPC network or create a new one for private and secure network setup.

Public IPv4 and VPC Network
10. Fill in User Information and Billing Details
- Username: Enter a username for your virtual machine. This will be used to log in.
- Password: Set a password that meets the security criteria
- Confirm Password: Re-type the password to ensure it has been entered correctly.
- SSH Public Key: Paste your SSH public key here if you plan to access your VM securely via SSH.
- Initialization Script: Optionally, you can add a custom configuration for the VM by using an initialization script. This can include cloud-init configurations to automatically set up your VM during the creation process.
- Resource Name: Provide a resource name for your VM. This will be used to generate a suitable hostname for the machine if applicable.
- Estimated Monthly Cost: This gives you an overview of what you’ll be charged based on the current setup.
- Billing Account: Choose a billing account to associate with the VM.
11. Create the VM
-
Once you’ve completed all fields and reviewed your details, click the Create button to finalize the creation of your virtual machine.
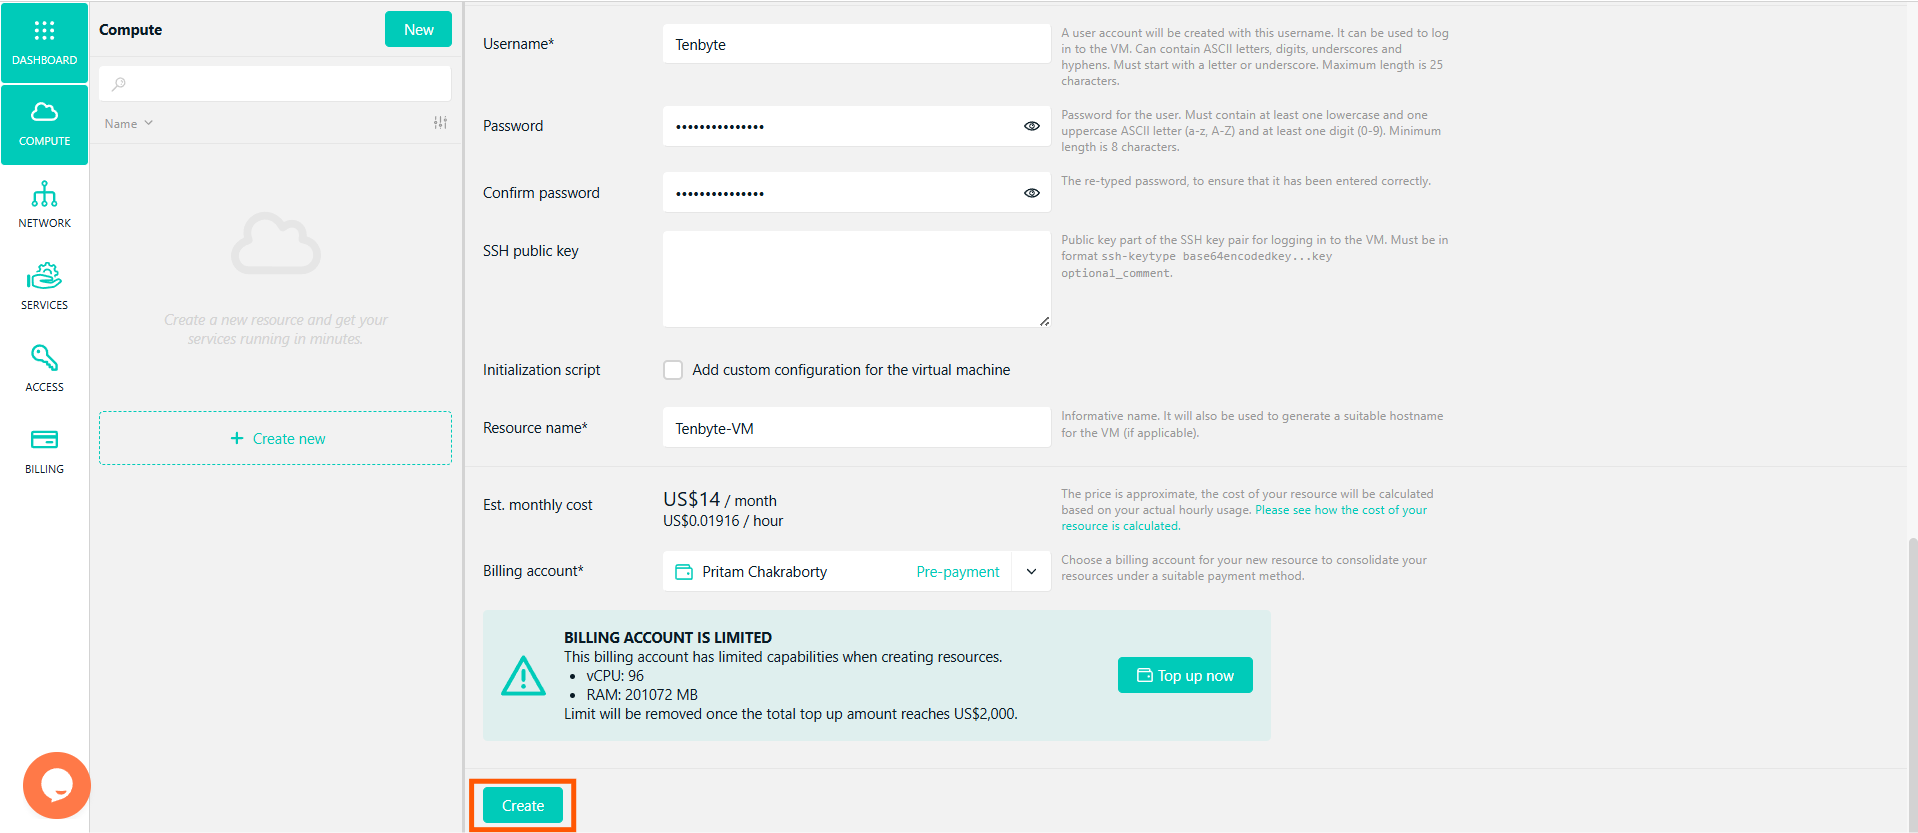
Create your VM
12. View Your Created Virtual Machine
-
Once your virtual machine (VM) is created, you will see it listed on your VM dashboard.
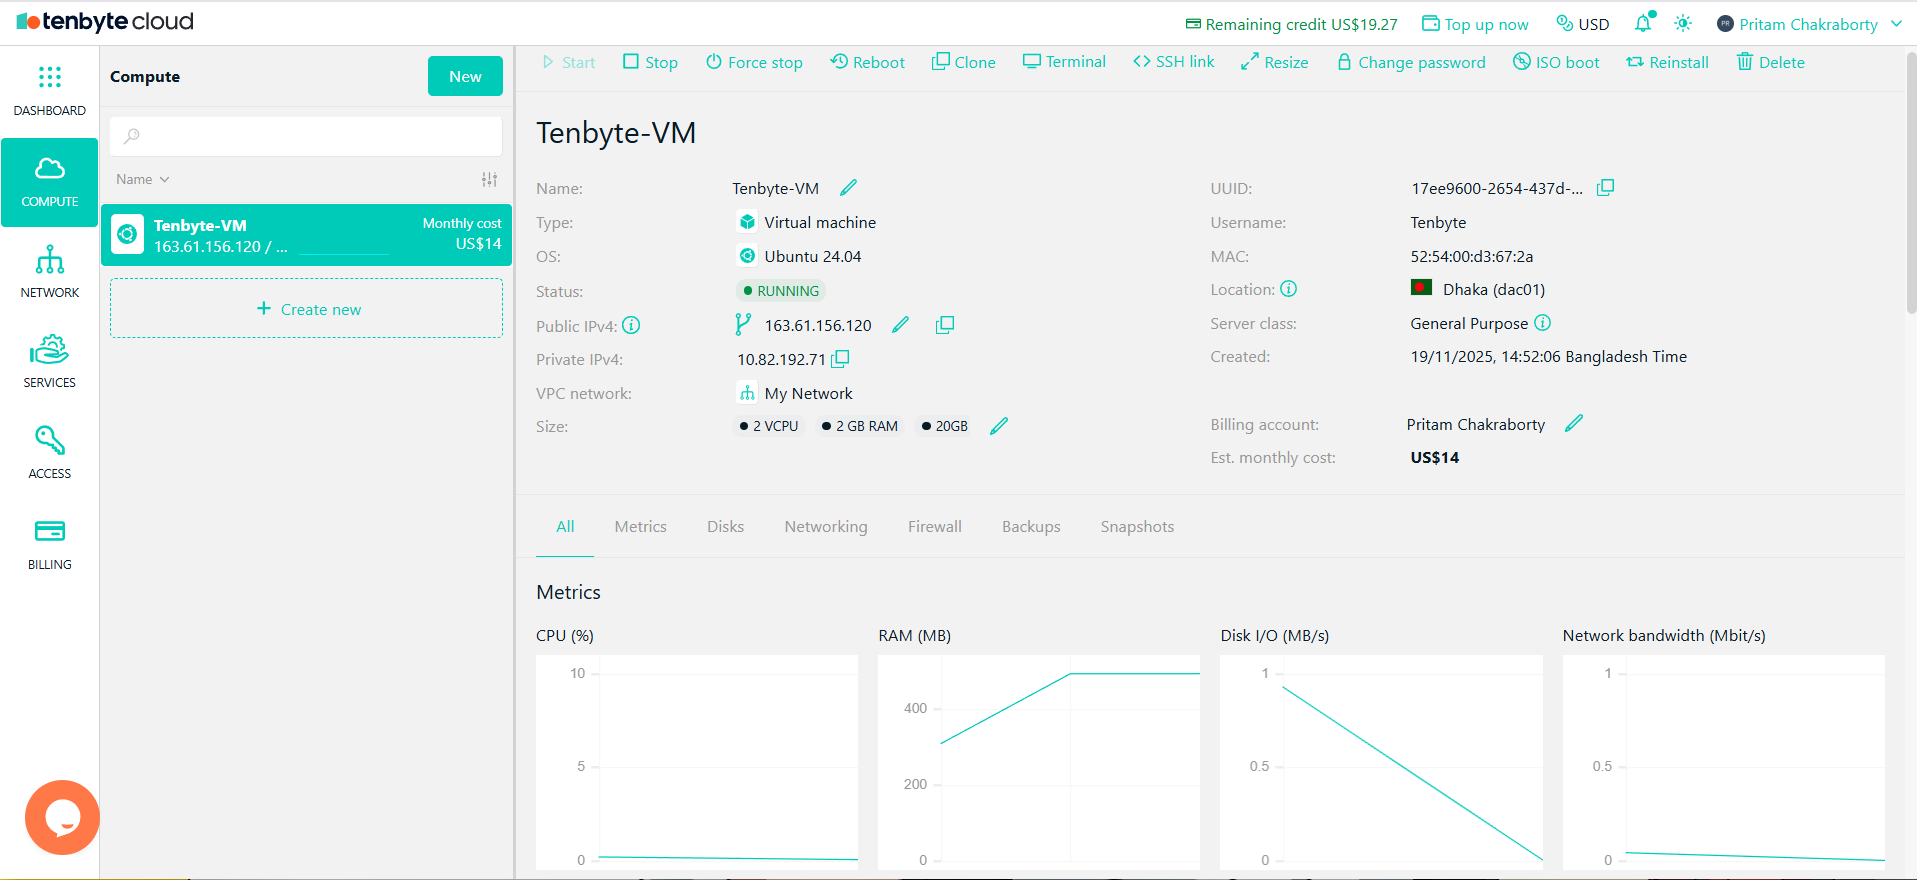
View Your Created Virtual Machine